Pages

Friday, February 27, 2015

Lot of 23 "LOVE YOU DEARLY" cards for kids *w/measurements


What fun these were and ohhhh so easy to  make.  I used up nearly the entire My Mind's Eye Boy Crazy 6 x 6 paper pad. There are some scraps left that I am going to cut up and maybe make a scrappy card or two.  

I ended up with 23 cards in this batch. 

**Measurements down at bottom.


 I started by pulling out each sheet and cutting it ~ using the method in the picture below this one.   I am using the sketch that is in the upper right corner of the picture.


This is how I cut each sheet.  There was two sheets that wasn't usable, I could use the pattern on the one side, but it was like tags on the other.  I took one sheet that had the red chevron on it and used it to cut some of the 2" x 3 1/2" rectangles and the other was a top layer for one of the cards. 


All the pages are cut and layered onto a dark brown layer.. these are all the pieces paired up.


Laying several of the white pieces for the sentiment, onto a dark piece of card stock when I stamp the sentiment, makes it easier to see and lineup. 


I took care of putting foam tape on the back of each of the sentiment layers. 


Here all the card tops are completed.. now to put them onto card bases.


This is how I cut each sheet of paper:


Here is the sketch I used ~ SSSC203:


*MEASUREMENTS:

card base 8 1/2" x 11"  scored at 4 1/4"

solid layer:  4 1/8" x 5 3/8"
pattern:  4" x 5 1/4"

rectangle:
solid 2 1/8" x 3 5/8"
pattern:  2" x 3 1/2"

sentiment strip:  *this is determined by the size of your sentiment
solid: 1 3/8" x 4 3/8"
white:  1 1/4" x 4 1/4"

*SUPPLIES:

card stock:  white, brown
pattern paper: MME Boy Crazy
stamps:  Paper Smooches Pretty Phrases
ink:  Hero Arts Black
accessories:  Scor-Pal, Large Fiskars Circle Punch, LifeStyle Crafts Large Dots embossing folder, hole punch, mini silver brads and Foam Tape


thanks for looking ~

have a great airborne day!
God Bless All Our Military.. each and every one of them

21 "YOU MEAN THE WORLD TO ME" cards complete *w/measurements


The minute I seen this pattern paper in a Tuesday Morning store sometime last year, I just had to have it.  There is a whole bunch of sheets in a pack, double sided and they were only $1.99.   I have had it laying to the left of my desk for a week now and decided to make some cards using it.

I ended up with 21 all together. These are super easy to make ~ the ONLY time consuming thing is the banner and truthfully, you could just make that banner into a long rectangle and the cards would be just as nice.  I might do that next time.


I cut the banner pieces a little longer than I needed after the tails were cut. I would cut them two at a time to save some time, then cut each one down to 4 1/2" long.  I then adhered each one to a black panel and trim the top and the banner tails on it as well.


One banner down.. 19 more to go (I was putting together 20 cards this morning as I made the sampel one last night)


After the banners are all trimmed and put together, I'm ready to put these babies together.

Getting after it.. to get them put together!


*MEASUREMENTS:

card base:  8 1/2" x 11" scored at 4 1/4"

solid layer:  4 1/8" x 5 3/8"
pattern layer:  4" x 5 1/4"

banner
solid layer:  2 5/8" x ...  not really measured, I cut them at 5 1/2" then after putting the pattern piece on, I trimmed it down.
pattern piece:  2 1/2" x 4 1/2" *note, that is after the banner tails are cut. I cut it more like 4 3/4" or 5" and then trim the tails, then cut the banner to 4 1/2"   hope that makes sense.

sentiment:  *this is determined by what size your sentiment stamp is, adjust accordingly
solid layer:  2 5/8" x 2 5/8"
pattern:   2 1/2" x 2 1/2"


*SUPPLIES:
card stock:  white, black
pattern paper:  Imaginisce *doesn't have a name on the strip at the end of the paper
stamps:  Stamps of Life Phrases2Say
ink:  Hero Arts Black
accessories:  Scor-Pal, Martha Stewart Heart Border Punch and Foam Tape Dots

Here's the sketch I used:


thanks for looking ~

have a great airborne day!
God Bless All Our Military.. each and every one of them

Thursday, February 26, 2015

THANKS EVER SO MUCH card made using scraps


This is just a quick card that I made using up some scraps from the Authentique Pride paper pad and a stamp from a Paper Smooches Pretty Phrases stamp set.  


thanks for looking ~

have a great airborne day!
God Bless All Our Military.. each and every one of them

MFTWSC217 "YOU ARE PRETTY AMAZING" Patriotic Hero Card


I have been making  lots of cards for Operation Write Home and have been using some of my most favorite Patriotic paper from Authentique called Pride.   I had a bunch of strips leftover from some of the cards and as soon as I seen this sketch, I knew what I was going to do.  I first cut a navy blue panel and embossed it, but the banners disappeared because it was so dark, so I went with a cream layer instead.   

I will write a note to a Hero and send it in my next box to OWH.


Here's the sketch I used:   MFTWSC217

SUPPLIES:

card stock:  MFT Red, Navy and cream
pattern paper:  Authentique Pride
stamps:  MFT Complimentary Greetings
ink:  MFT Hybrid Black
accessories:  Scor-Pal, MFT Blueprints Stitched panel, Cuttlebug Star embossing folder, SU photo corner punch and foam tape


thanks for looking ~

have a great airborne day!
God Bless All Our Military.. each and every one of them

Lot of 20 Patriotic "THANKS SO MUCH" cards *w/measurements


Today I made 20 more cards. I made some more "THANKS SO MUCH" cards using more of the Authentique Pride pattern paper.   These were super easy to make.  

*MEASUREMENTS BELOW.


here are all 20 completed cards.


This was when I had one card top complete and only 19 more to go.


 As I finished each card top, I would lay it over on my paper trimmer. After completing all of them, I thought they looked so pretty.  


*MEASUREMENTS:

card base:  8 1/2" x 11" scored at 4 1/4"

solid layer:  4 1/8" x 5 3/8"
embossed layer:  4" x 5 1/4"

rectangle layer
solid layer:  2 1/8" x 3 5/8"  *see note below for cutting this layer
pattern layer: 2" x 3 1/2"

sentiment layer
solid layer:  2 1/8" x 2 7/8"
cream layer:   2" x 2 3/4"


To get the most from a solid piece of card stock to cut the piece into 2 1/8" x 11" strips, then cut those strips into:   for the rectangle layer cut them 2 1/8" x 3 5/8" strips for the sentiment layers cut them 2 1/8" x 2 7/8".  you will get many pieces without having a lot of waste

Here is the sketch I used:  SSSC230


SUPPLIES:

card stock:  cream, navy
pattern paper:  Authentique Pride
stamps:  Stamps of Life Phrases2Say
ink: Hero Arts Black
accessories:  Scor-Pal, Red Brads, Paper Piercer, SU Star Punch, Darice Star Embossing Folder and Foam Tape


thanks for looking ~

have a great airborne day!
God Bless All Our Military.. each and every one of them

Lot of 20 Patriotic "THANKS SO MUCH" cards *w/measurements


Today I wanted to work on some more Patriotic "Thank You" cards. I made one last night and used a red embossed star layer and today I decided to go with Kraft rather than the red. I like the way they turned out. 


Below is when I had everything cut, stamped, punched and ready to go. The red card I made last night is shown below.


*TIP:  When I am embossing a lot of pieces, I do two at a time. I noticed on the bottom layer of the two pieces embossed, the stars were more predominant if I flipped it over and used the debossed side, I think that's what it's called.  I wanted to show below what the two looked like.  Pretty neat huh?


The sketch I used was a Sweet Sunday Sketch Challenge #231 sketch.. instead of several banners, I just made one and went with that.


MEASUREMENTS:

card base:  8 1/2" x 11" scored at 4 1/4"

solid layer: 4 1/8" x 5 3/8"
pattern:     4" x 5 1/4"

strip:
solid:  2 1/8" x 4 1/8"
pattern: 2" x 4"

banner flag:
solid 1 5/8" 4 5/8" *This piece isn't one I really measure as I cut a strip longer than this, punch out the banner ends and then after adhering the pattern banner to this piece, I just cut off the excess
pattern:  1 1/2" x 4 1/2" *I cut this piece longer, punch the ends, then trim it to 4 1/2"


SUPPLIES:

card stock:  cream, kraft, navy
pattern paper:  Authentique Pride
stamps:  Stamps of Life Phrases2Say
ink:  Hero Arts Black
accessories;  Scor Pal, Circle Punches, SU Photo Corner Punch, Darice Star Embossing Folder and Foam Tape


thanks for looking ~

have a great airborne day!
God Bless All Our Military.. each and every one of them

Wednesday, February 25, 2015

21+2 "THANKS EVER SO MUCH" and "THANKS SO MUCH" cards using Authentique Pride paper *w/measurements


Anyone that knows me, knows that I love all things Red, White and Blue.  It's my favorite color combination to use on cards and yesterday morning while cleaning off the area where my Big Shot is, I glanced up at the shelf where some of my 6 x 6 paper pads are and seen these beauties. They are the most gorgeous Patriotic paper pads I have ever seen.   

During a blog hop a couple of years ago I won one of these pads and I loved it so much that I ordered a bunch off of Walmart.com.  Last year while in Charlotte, NC for the Coca Cola 600 NASCAR race, I spotted some in A.C. Moore and bought every one they had. The paper pad is from Authentique and called Pride.

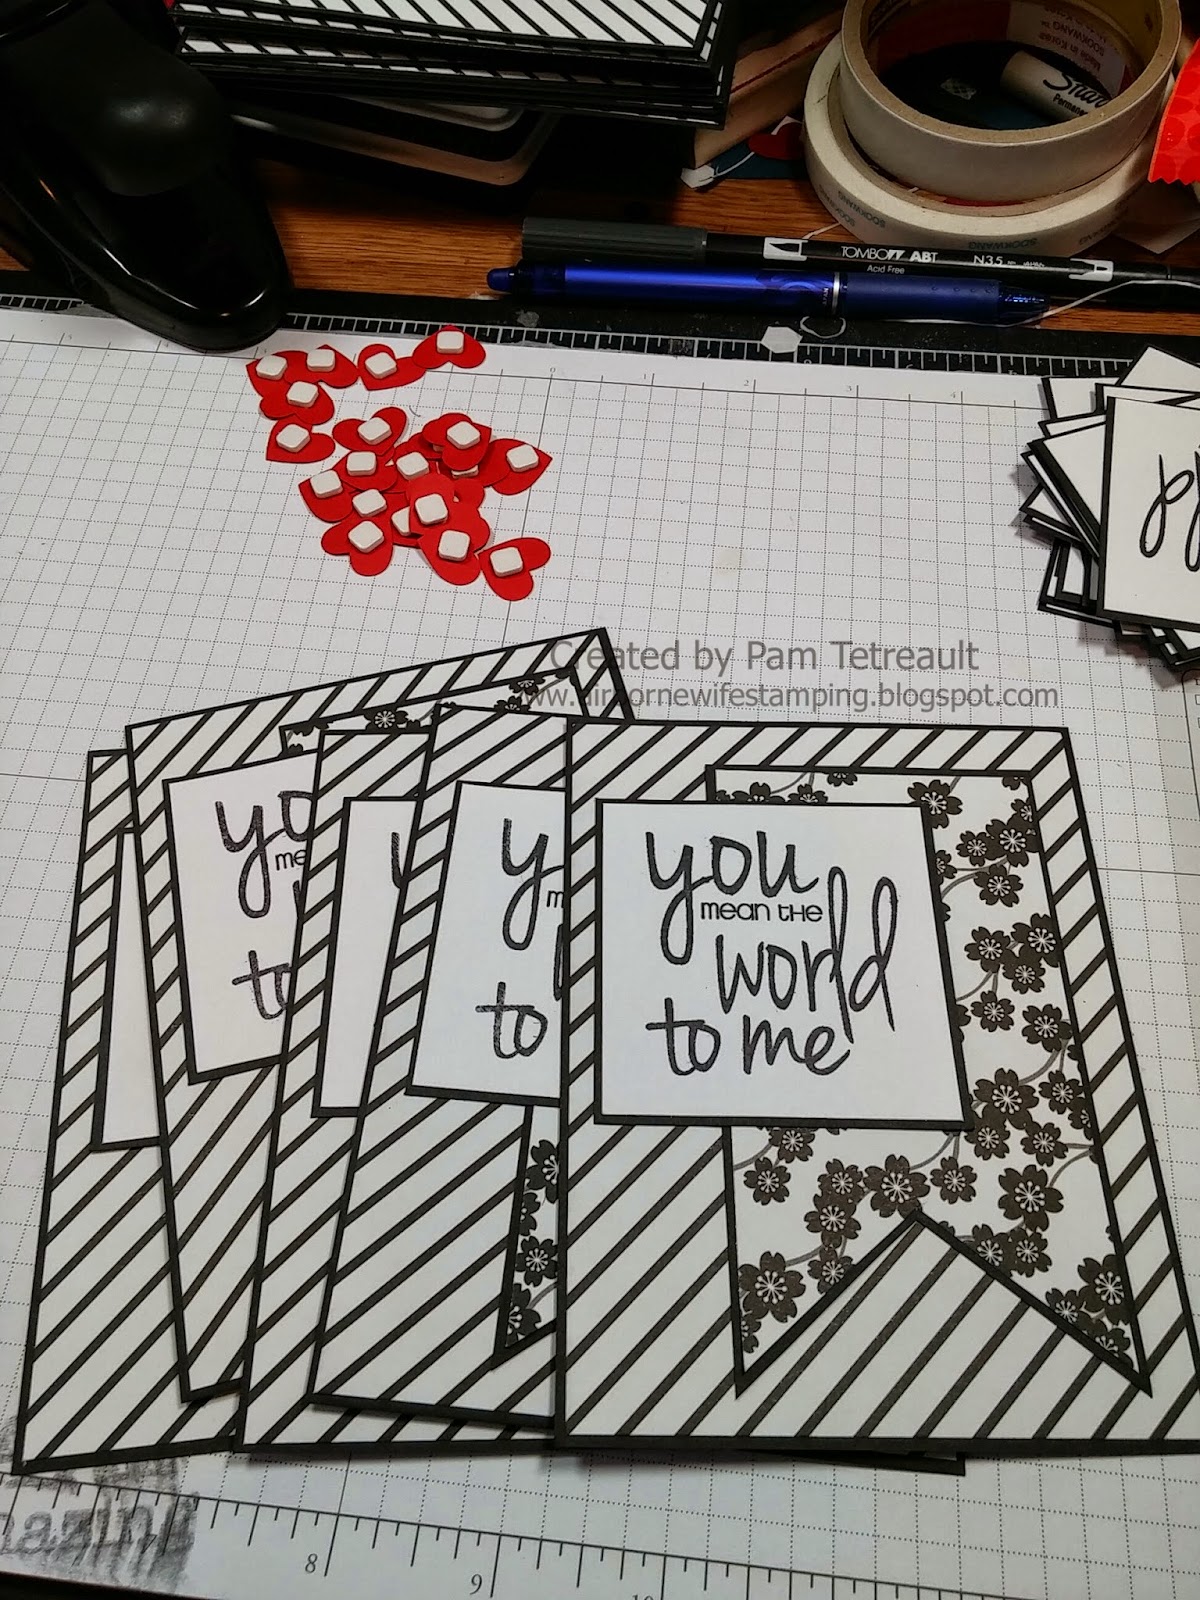
Last night I set out to make some "THANK YOU" cards and ended up making all the cards in the picture above.   I made the two cards with the red embossed layers first and then made the one like all the others shown, it was my favorite so I set out to make 20 more.   

*MEASUREMENTS AND SUPPLIES AT BOTTOM OF POST

This picture below shows all the scraps I had leftover from a big lot of cards I made a while back.    The first thing I did was sort through the scraps.  There were a bunch that were at least 2 1/8" wide, so I trimmed them to 2 1/8" x 4 1/2".   I then found a bunch that were 1 1/2" wide. I pulled them aside to use as the banners.    I did have to cut into a couple of sheets in one of the pads to make more banners.   All I have left of the scraps are the thinner strips and I just printed off a new MFT sketch that has a bunch of thin banners on it, so I'm going to see what I can do to use them for that sketch.


In this picture I have everything cut, scored, embossed, stamped and punched to make 20 cards.  *note. some of the banners weren't trimmed down yet because I wasn't sure which side of the banners I was going to use and in the end, it didn't matter which side, so I could have already had them trimmed to 3 3/4" long.  


 Tip:  When I do a lot of stamping on lighter card stock, I always lay the pieces on a dark colored piece so that it's easier to line up the stamp and stamp onto it.  I also try to do them in batches by laying out an even amount to the darker piece and stamp each one, move them aside and lay down the next group. I find it moves much faster than doing them one at a time.


I also do adhesive in batches as well.  Sometimes I do more than this many at a time, but these were pretty easy with just two strips of adhesive on each one.


I should've taken my own advise to do the assembly in batches.. however I did find that if I took each piece needed for the card top, assemble them and then set it aside.    That got old for me so after 13, I decided to put adhesive on every piece that was needed for the last 7 cards.  There is more pieces to the left of me sitting on my trimmer.   I do each card top and then the final thing is to put them all on the card bases.


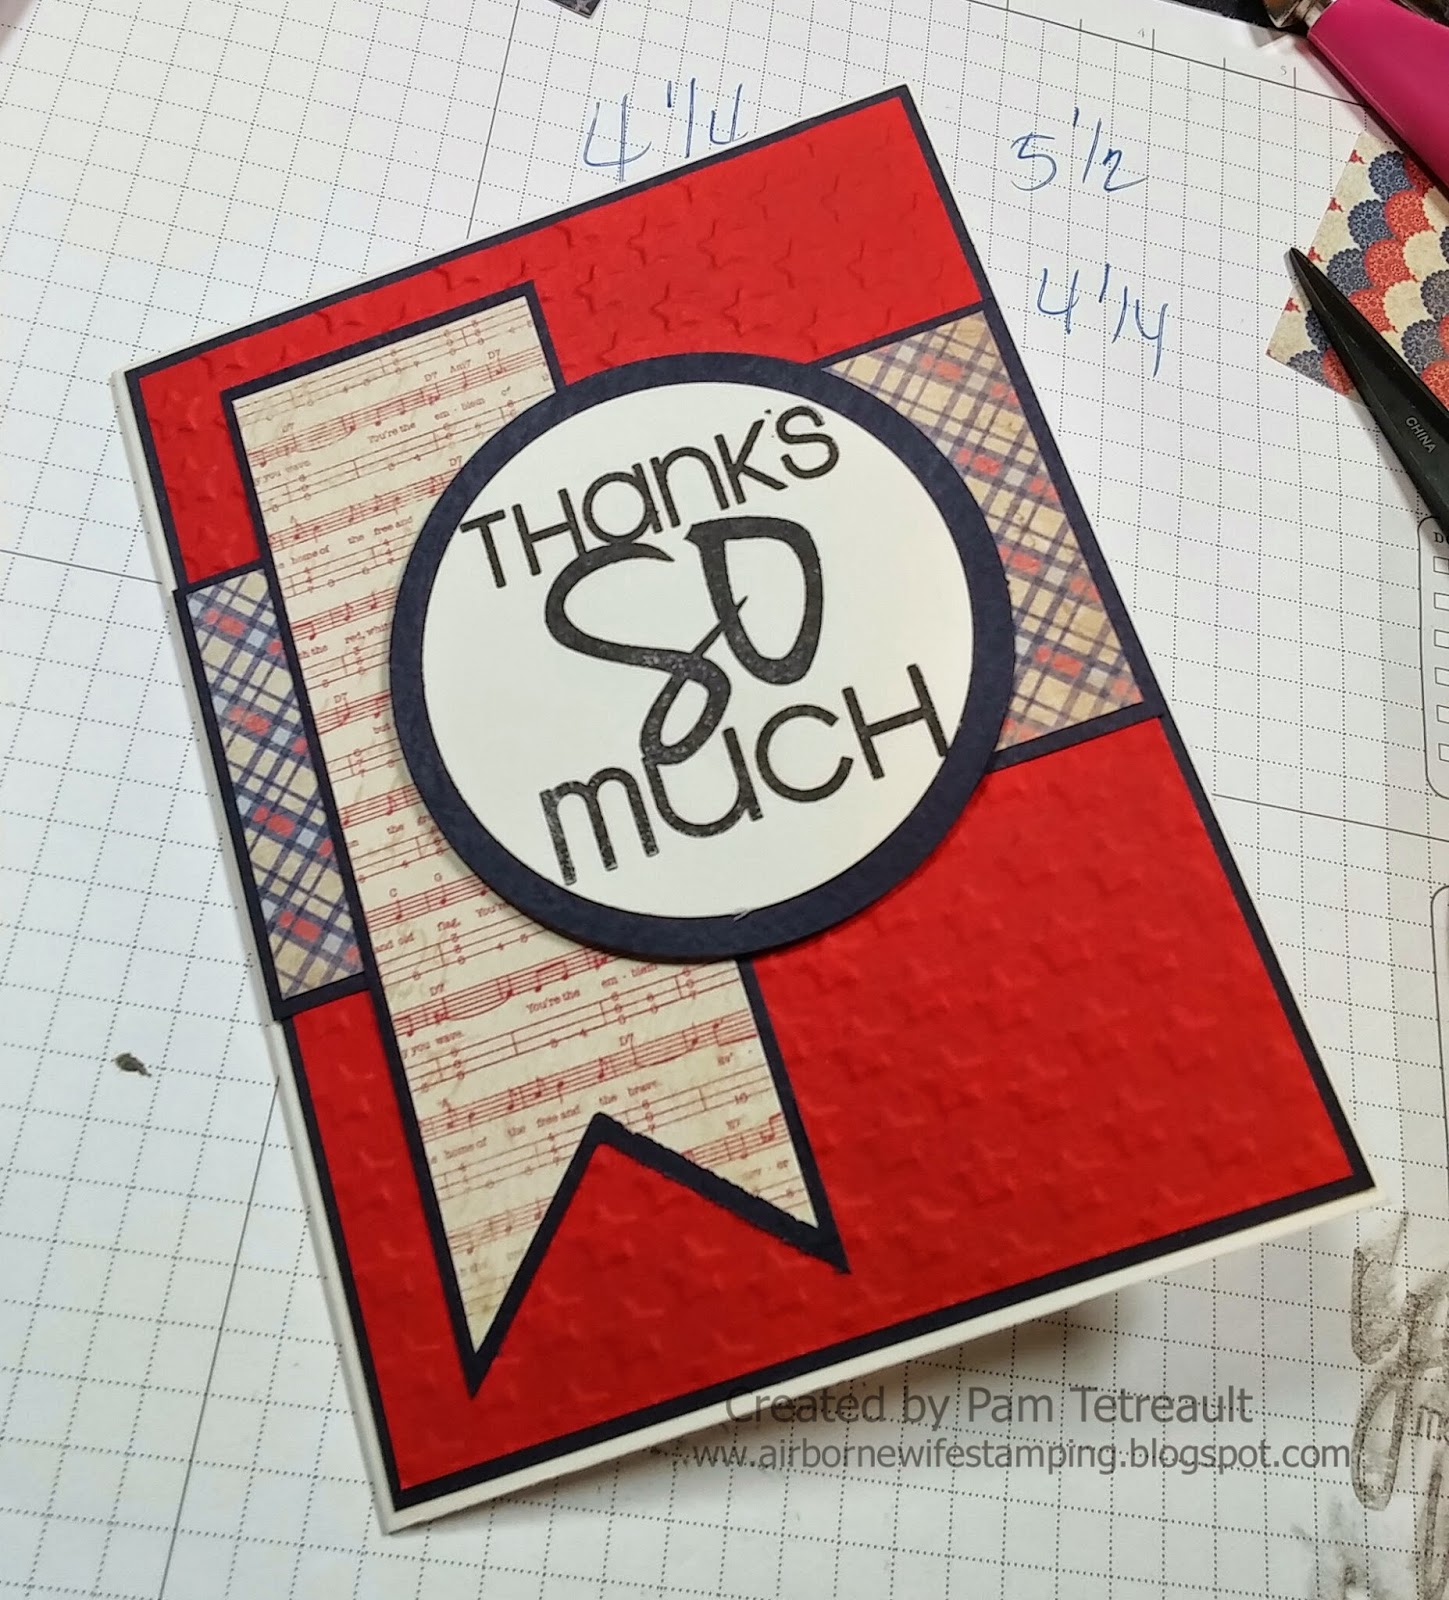
Here are a look at each of the card samples.   This one was my favorite.


 This one will be super easy to produce. I will post a separate blog post about this card and the one below it, with measurements, etc. when I make lots of them.


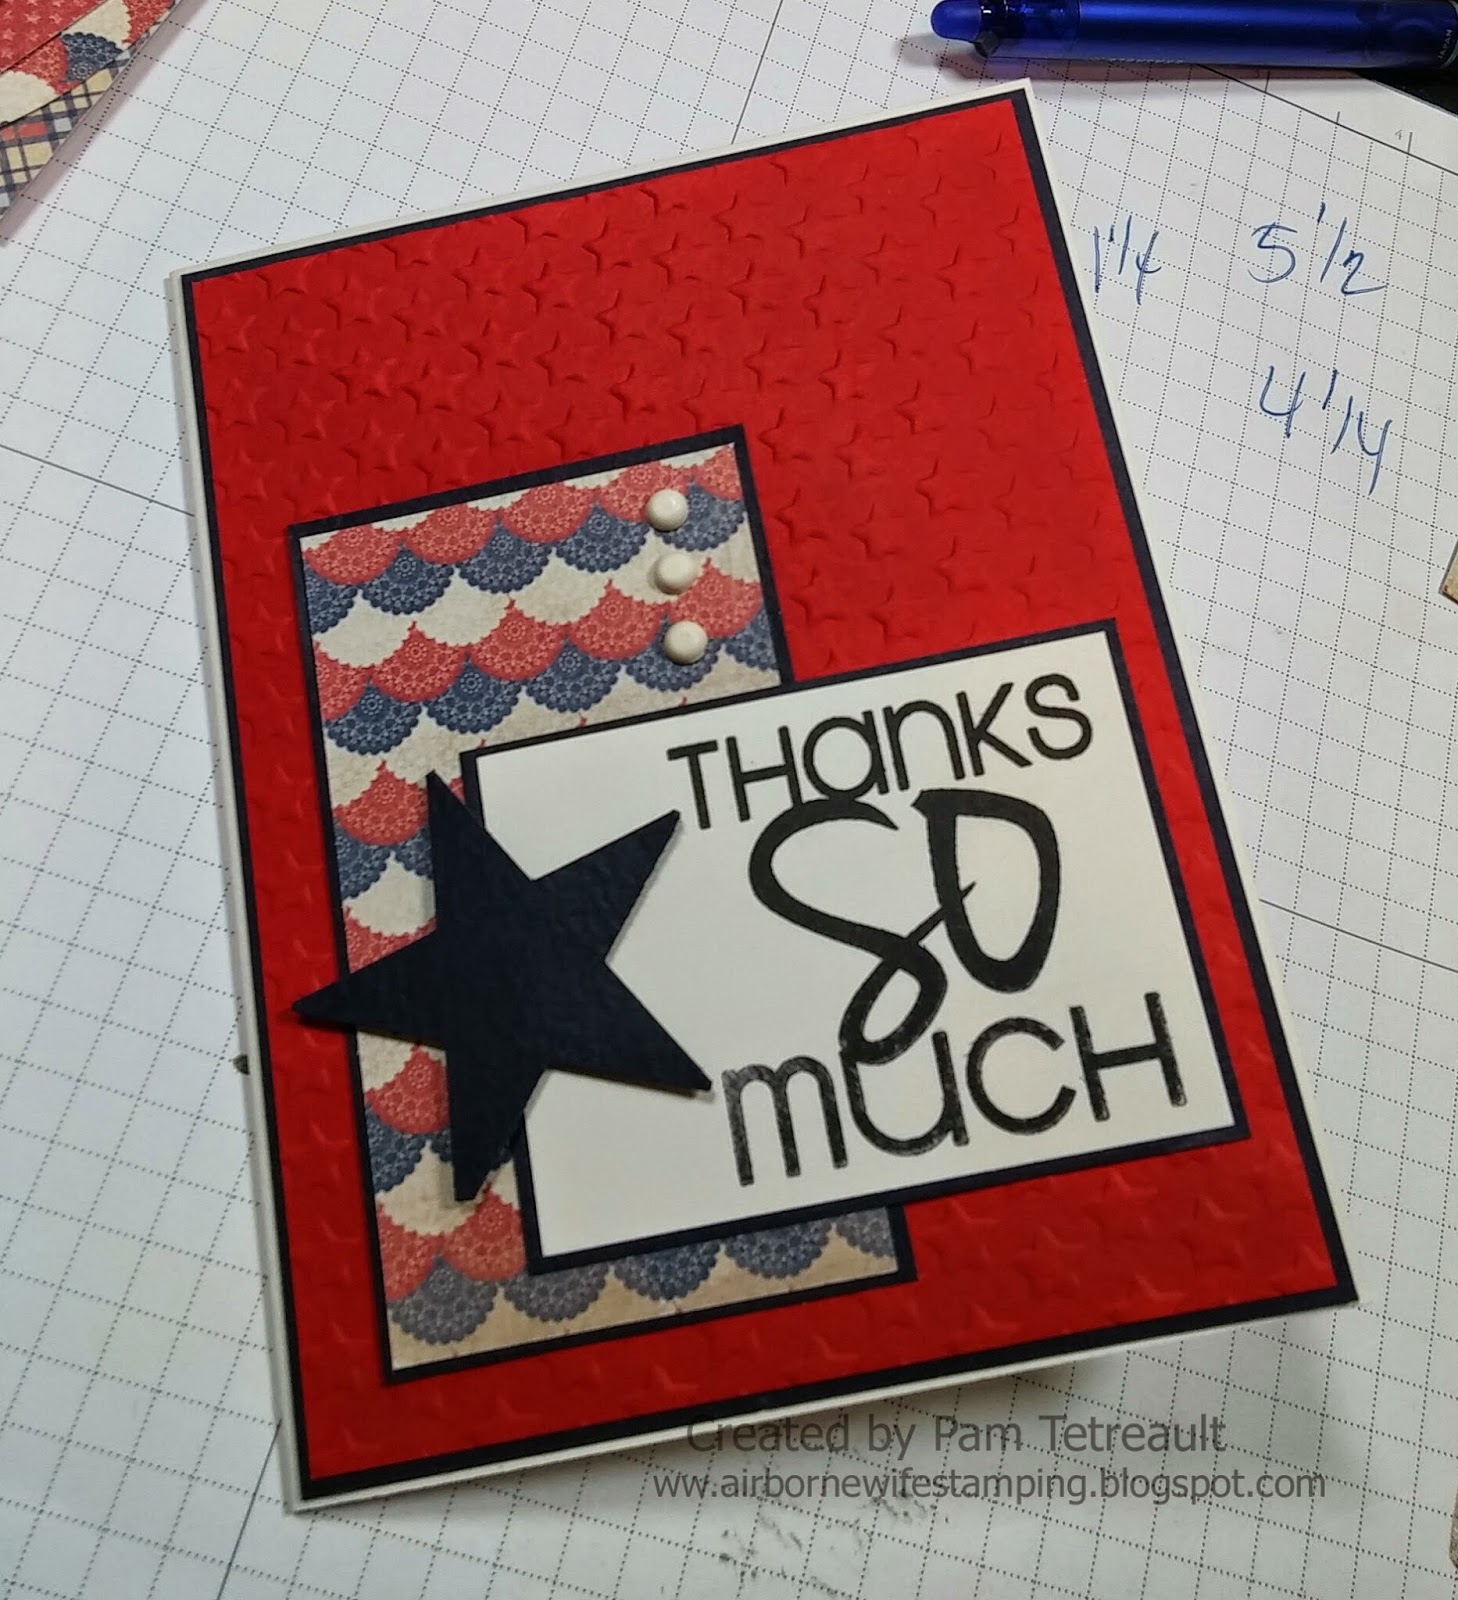
 A super fun card.. I just love the embossed star layer on this card and the one above ~ makes me happy!


*MEASUREMENTS (these are for the lot of 21 cards ~ others to follow in another blog post)

card base:   8 1/2" x 11"  scored at 4 1/4"

solid layer:  4 1/8" x 5 5/8"
embossed layer: 4" x 5 1/4"

large strip:
solid layer:  2 1/4" x 4 5/8"
pattern layer: 2 1/8" x 4 1/2"

sentiment layer:
solid layer:  1 3/8" x 3 5/8"
stamped layer: 1 1/4" x 3 3/4"

banner:  *after punching/cutter banner ends
solid layer:  1 5/8" x 3 7/8"
pattern layer:  1 1/2" x 3 3/4"


*ADDED> >>>  this is the OWH sketch is what I used, I had to just tweak some measurements to fit the scraps I was working with.


*SUPPLIES:

card stock:  red, navy blue and ivory
pattern paper:  Authentique Pride
stamps:  Paper Smooches Pretty Phrases *Thanks So Much from Stamps of Life Phrases2Say
ink:  Hero Arts black
accessories: Scor-Pal, SU Star Punch, SU Photo Corner Punch (banner ends), Darice Star Embossing Folder and Foam Tape


thanks for looking ~

have a great airborne day!
God Bless All Our Military.. each and every one of them

Tuesday, February 24, 2015

30 cards complete "I MISS YOU, YOU MEAN THE WORLD TO ME, LOVE ALWAYS, I LOVE YOU" from one 6 x 6 paper pad


Another 6 x 6 paper pad is now all gone. .. this time it's My Mind's Eye Stella & Rose ~ Mabel.  I have several of this pad, so I might come back and make a large batch of the cards on the second row down with the banner and the scallop under the strip.    


These were the first ones I made from the paper pad and at first used a larger scallop, I didn't like it so I took it off and found another scallop that was smaller and I liked the way it looked.


 Some more "I MISS YOU" cards.. these were super easy. I could make a whole bunch of just this sketch and one paper pad for sure.


Some "Love Always" cards. The hearts have small embossed hearts on them.   The sentiment is from an Annabelle Stamps stamp set.


SUPPLIES:
card stock:  brown, cream, kraft
pattern paper:  MME Stella & Rose ~ Mabel
ink:  SU Early Espresso
stamps:   Stamps of Life Phrases2Say, Annabelle Stamps Love Always (I think the set is called Fanciful Flowers), Craft Smart I Love You
accessories:  Scor-Pal, Heart Punch, Scallop Heart Punch, Circle Punches, Cuttlebug Heart Embossing Folder, Brown Brads, Hole Punch, SU Scallop Border Punch and Foam Tape


thanks for looking ~

have a great airborne day!
God Bless All Our Military.. each and every one of them